 PixelVibing
How to Make Pixel Art Game UI with AI: a HUD, Item Icons and Skill Icons
Game UI is where indie games look most "programmer art": a default font, a grey rectangle for a health bar, emoji for inventory items. Good pixel art UI is a lot of small pieces that all have to match each other and the game.
This tutorial makes a complete pixel art game UI with AI in PixelVibing: a HUD set, a row of item icons, skill icons for a hotbar, and custom menu pieces from a sketch.
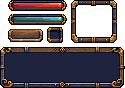
One generation, six pieces that match, in the game's driftwood-and-brass look.
Part 1: A HUD set in one generation
A HUD set is drawn together, so the pieces share one material, one frame and one palette:
health-barandmana-barbuttoninventory-slotpanel-frameminimap-frame
Ask for all six, or only the ones you need, with an optional theme:
pixel-vibing-cli generate hud --instruction "driftwood and brass, nautical" --yes
pixel-vibing-cli generate hud --pieces health-bar,mana-bar,button --yes
Nine-slice ready. Frames, buttons, slots and the minimap frame come with nine-slice insets, so you stretch them with your engine's nine-slice sprite to any size, instead of scaling them and blurring the border.
Part 2: Item icons and skill icons
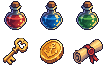
Up to sixteen icons that match, from their names, at 16, 32 or 64 px:
pixel-vibing-cli generate icons --names "health potion,mana potion,iron sword,gold coin,golden key,fire scroll" --purpose item --size 32 --yes
Choose the purpose:
| Purpose | What you get | Use it for |
|---|---|---|
item |
Each icon alone, transparent around it | Inventory, loot, shops |
skill |
Each icon on a square badge | Hotbars, skill trees, cooldowns |
Part 3: Custom UI from a sketch
When you need pieces the HUD set doesn't have, like a portrait ring, a quest panel, a compass or a row of hotbar slots in exact places, sketch the layout:
- Rectangles, rounded rectangles, ellipses and polygons: up to 16 shapes on a 128 or 256 px canvas.
- Give each shape a note ("a full red health bar") and, if it shows text, a caption drawn exactly as written ("Quit").
- A hollow frame keeps its inside transparent, for the game behind a window.
- A border width gives the piece nine-slice insets.
- Add up to three style references, such as a material or a frame you like, and the whole set takes their look.
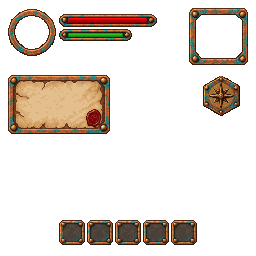
The platform draws the set in one go and hands you every piece cut out on its own, with where it sits, ready for your engine. Sketching works in the web app, the Editor, the command line and the MCP server.
Part 4: Agree on the look first (optional)
Not sure what the HUD should look like? Generate a HUD mockup, one screen with its whole interface, to agree on the style, then take its pieces out in the Editor:
pixel-vibing-cli generate hud-mockup --instruction "a cozy fishing game HUD with a day clock and a catch counter" --yes
UI tips
- Draw numbers in code. Generated art carries no text or numbers (apart from a sketch's captions), so health values, counts and labels stay sharp and translatable.
- Match the HUD to the world. Name a material from your game ("driftwood", "rusted iron", "jade and gold") instead of "fantasy UI".
- One icon size per screen. Mixing 16 px and 32 px icons in one inventory looks off.
FAQ
Do the icons match my sprites? Yes. They're drawn from your game's style guide, like every other asset.
Can I get button states? Yes. In a sketch, three buttons with the notes normal, pressed and disabled come back as one button in its three states.
Is it commercial-use OK? Yes, what you make is yours.
Next: polish any of it by hand. Read How to edit AI pixel art in the PixelVibing Editor.