 PixelVibing
How to Make Pixel Art Game Assets with AI (Without Drawing a Single Pixel)
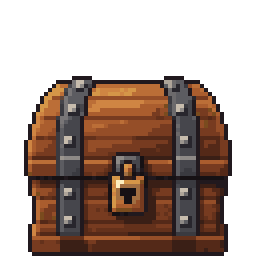
You have a game idea, a coding assistant that writes the code, and zero drawing skills. The art is where most solo games stall: asset packs never quite match, commissions are slow, and generic AI image tools give you pixel-ish pictures with blur, stray half-pixels and the wrong size.
This tutorial shows how to make real pixel art game assets with AI in PixelVibing: a treasure chest, a lighthouse, a market stall, each drawn on the pixel grid at its exact size in your game and in one shared style.
The chest above came from one sentence: "a wooden treasure chest with iron bands and a gold lock".
Why most AI pixel art doesn't work in a game
Ask a general image model for "pixel art" and you get something that looks right as a thumbnail and falls apart in an engine:
- No real grid. Pixels drift, so edges blur when you scale the sprite up.
- Anti-aliasing and soft gradients. One flat colour per pixel is the whole point of pixel art.
- Wrong size. A 2×2-tile market stall comes back as a random 1024 px picture you have to shrink by hand.
- No shared style. The tenth sprite doesn't match the first, so your game looks like a collage.
PixelVibing is built around those four problems.
Step 1: Describe your game once
Create a project in the web app and write a few sentences about your game, for example:
A cozy top-down fishing game in a small harbour town. Warm dusk colours, chunky outlines, 32 px tiles.
PixelVibing turns that into your game's style guide: the camera, the palette, the outline, the shading and the scale. Every asset you generate afterwards is held to it, which is why art made weeks apart still looks like one game. You can edit the guide any time as the game grows.
Step 2: Ask for an object in plain words
No prompt engineering. Describe the thing as you would to an artist: what it is, what it's made of, what it's for.
In the web app or the desktop Editor, pick Object, type your description and choose its footprint in tiles. From the command line it is one line:
pixel-vibing-cli generate object --instruction "a wooden treasure chest with iron bands and a gold lock" --size 1x1 --yes
The cost in credits is shown before anything starts, and whatever a generation doesn't use is given back.
Step 3: Pick the right footprint
The footprint is the object's size on your map, in whole tiles. It is what makes the asset drop straight into a level without resizing.
| Object | Footprint | Why |
|---|---|---|
| Crate, chest, barrel | 1x1 |
Fits one tile |
| Lamp post, tall plant | 1x2 |
One tile wide, two tall |
| Rowing boat | 2x1 |
Wide, low |
| Market stall, well | 2x2 |
A small building |
| Lighthouse, tower | 2x3 |
Tall landmark |
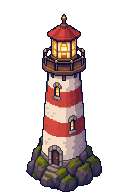
A 2×3 lighthouse: base on the ground, transparent around it, ready to place.
Step 4: Use it in your engine
Every asset lands in your project as a transparent PNG with its base on the ground. When you're ready, export sprite sheets for PixiJS, Phaser or Godot, or a simple default format any engine reads:
pixel-vibing-cli export godot
Tips for better pixel art assets
- Name the material. "Weathered oak", "brass", "mossy stone" do more than "nice" or "detailed".
- Say what it does in the game. "A loot chest found in dungeons" gives it the right weight and wear.
- Add a reference when you have one: a screenshot of a game you love or a rough sketch. Objects take up to eight.
- Keep the style guide true. If your game moves to a snowy region, add it to the guide instead of repeating "snowy" in every request.
FAQ
Is it real pixel art? Yes: one flat colour per pixel, hard edges, no blur and no anti-aliasing, at the size the asset has in your game.
Can I sell a game made with these assets? Yes. What you make is yours, for commercial use too.
Do I need an API key? No. Sign in and generate; every new account starts with free credits.
Next: give your game a hero. Read How to make a pixel art character sprite with AI, or start free and make your first asset in a minute.